Take the plunge and start your own campervan conversion journey…. How hard can it be, right?
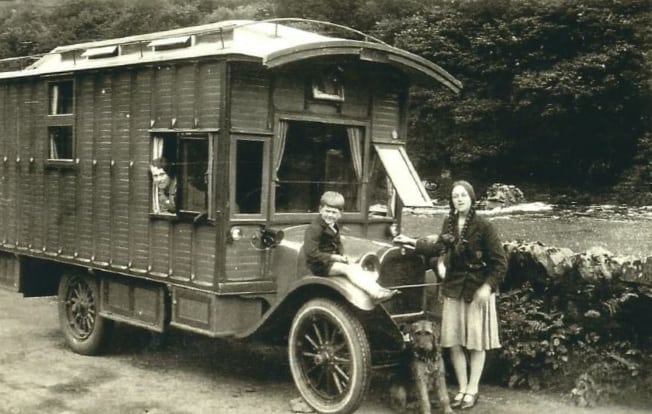
People have been building their own campervans for decades. In fact, a customer’s father recently told us that the concept of a campervan has been around almost as long as the Automobile itself. He remembered going away on campervan holidays in the 1920’s as a child with his own parents. He kindly shared some of his vanlife memories and photos with us.
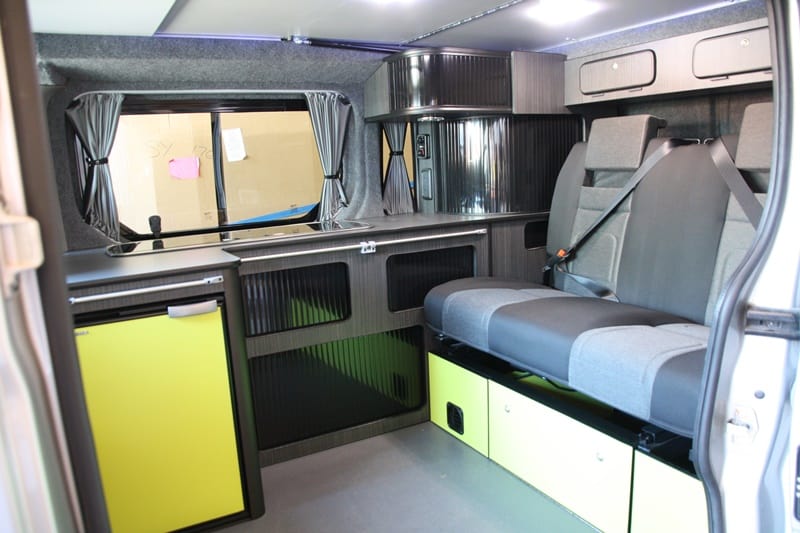
The pictures below show him as a young lad sitting on the wheel arch of his father’s beloved campervan, and in more recent times with his son’s completed Renault Trafic campervan conversion.


A campervan conversion can be a really exciting project. And the satisfaction of heading out for a vanlife adventure in your own campervan is hard to beat.
Campervan conversion design has come on leaps and bounds in the last 10 years, and there’s more information and a products available than ever before. But don’t be fooled into thinking it’ll be quick and easy. The truth is the end result can be excellent, or a bit rough around the edges… it all depends on your planning and research!
To give you an idea of time scale, we spend around 120 hours transforming a standard panel van into a 4 berth Campervan – that’s an awful lot of weekends and evenings if you’re tackling it yourself.


Before you start your campervan conversion have a think about the following;
- How you will be using your van?
- What is your budget?
- What features are the most important to you?
- What jobs do you feel comfortable completing yourself?
Many customers visit our showroom with grand plans, but fitting everything into a campervan can be a challenge! There’s always a balance between amenities and storage. If you’re preparing your van for a month-long journey, remember to allocate space for storage and comfort essentials. For shorter trips like long weekends, a flexible van setup might be more suitable.
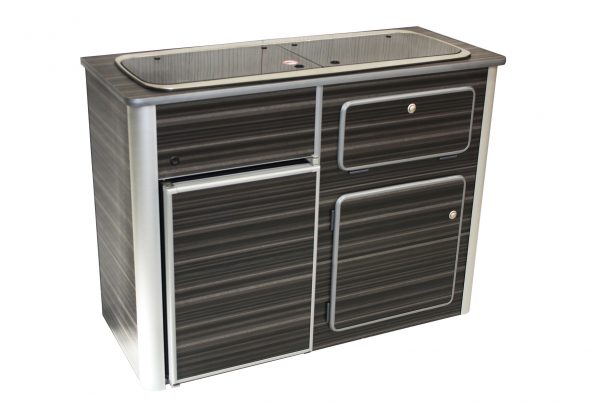
The addition of removable pod units and seating systems are proving to be a very popular for smaller conversions. It’s a quicker and more cost effective way of converting your van. And also easily allows the removal of facilities if you ever sell the van, or need it for other purposes.
Our Modular Pod Units are perfect for this scenario, maintaining maximum versatility of your van while giving a professional look and finish.
Once you’ve nailed down the type of campervan conversion design that suits your requirements, it’s time to start to consider the order of installation.
Generally campervan conversions can be broken down into 4 main stages, as listed below;
- Fitting windows/elevating roofs
- 1st Fix electrics
- Panelling, insulating, lining and flooring
- Installing facilities, units and seats
We offer a series of ‘How to’ guides from Clearcut Campervans that delve into the practical aspects of your van conversion. However, this particular guide focuses on planning and design considerations before starting any work.
Let’s explore the initial phase:
Fitting windows and an Elevating Roof.
In our campervan conversions, we first start with the disruptive tasks of fitting the elevating roof and window cutouts.
Cutting in a roof or window is a messy job that requires a good amount of preparation and fore-thought. It will be necessary to remove the headlining (if you’re fitting an elevating roof) and to cover and protect all exposed areas of the van internally and externally. We use a full external cover and a series of plastic covers for the internal cab. Cutting the windows will require similar but more localised preparation.


When installing an elevating roof, many self builders undertake the services of professional campervan conversion company. These companies usually offer a partial fit on elevating roofs, undertaking the trickier part of the fit such as installing the strengthening frame, roof hinges, air struts and roof cap. The finishing and trimming of the roof is then left to the self builder to keep costs down.
Companies such as Westdubs offer such a service for the fitting of their roofs.
It is possible to add an elevating roof at a later date, but we don’t recommend this. However, if you have to go down the route of fitting the roof at a later date, expect considerable extra work and expense in the roof’s fitting. Because re-trimming, furniture reprofiling, rewiring and potential damage to existing conversion furniture are all points of issue.


1st Fix Electrics.
Running the main electrical routes before the side walls and ceiling is panelled and lined is some thing that can be easily overlooked. Planning is needed to consider where led lights, switches, sockets and 240v inlets will be situated, as well as all the main appliances.
We usually include a centrally positioned earth point that cables can terminate at, rather than multiple earth points. You may well need earth points for appliances such as Fridges as well as 240v and 12v Earths to your Power management system. Because if these haven’t been allowed for, it can be problematic to find suitable Earth points once the van is panelled and lined.
Panelling, Lining, Insulation and Flooring.
The ideal scenario would be to cut your window apertures and prepare the metal edges first, then panel and line the van. Once the lining is complete would you fit the windows. The reason for this is that the cutting in of the carpet lining is much easier without the windows, or any window trim in place. However, often with self builds the vans are used on a weekly basis and it isn’t possible to have the van windowless for an extended period.
If you do have to fit the windows in before carpet lining, make sure the metal cut edges of the window have been properly rust treated. And ensure that any trim required is added to the window opening before the window is installed. This is important, because you won’t be able to fit window trim after the window is installed.

We install the ply flooring only after we’ve set up the panelling and carpet lining. Because, this approach prevents adhesive from getting on the ply, and allows the carpet lining to extend below the plywood level, making it easier to finish the flooring edge later on.
Before installing the carpet lining, we pre-cut the 12mm ply and test its fit to ensure it will slot into place easily afterwards. We maintain a 3-5mm clearance so it’s not too tight, preventing any damage to the carpet when positioning the flooring.

A few bits of advice…
Firstly, in small van conversions, simplicity and style usually win. Avoid overly complex designs. Features like sliding units or flashy gadgets can be expensive. Secondly, ensure you have the main components (like seating system, fridge, hob and sink) before you start planning and building your conversion. And lastly, drawings and CAD can help in planning, but be ready for last-minute changes. Vans aren’t perfect squares and drawn designs often miss issues that only appear as the conversion progresses
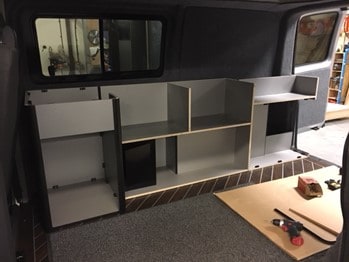
As an example, often customers will book their seating fitting after undertaking most of the self build themselves, only to have over looked door aperture positions or the width of the seat required. In these instances it isn’t possible to fit the seat and the whole conversion furniture needs to be taken out and slimmed down… nightmare!
Don’t be put off starting your own campervan conversion. All you need to create a campervan are some modest DIY skills, a stack of free weekends… oh, and a list of our How To Guides.


